Setting up your Raspberry Pi robots for multiple locations
Using Raspberry Pi robotos in multiple locations
If you run a Code Club at a location that you don’t have access to during the week, you may already have discovered how important it is to have everything set up beforehand. This often means being able to communicate what you want to whoever looks after the computer network at your Code Club location.
There’s a few possible scenarios:
- Your location already has computers set up and connected to the network. In this case things are pretty simple, as long as you’re just logging into sites with web browsers. As long as the network is up, you’re good. You’ll need a plan B if the network or Internet connectivity goes down.
- You bring your own network and computers. This is a fairly robust situation, except that you have to haul multiple computers around. All you need is power and heating/cooling to make things comfortable. Depending on whether you do things online or offline, you may need to have a place to save projects to.
- You have some online and activities going, but also have Raspberry Pis, robots, and some other hardware.
Since our situation is the 3rd scenario, I’m going to write a bit about some of the challenges we’ve faced and try to share some tips for dealing with these so that your room full of kids doesn’t revolt and eat you alive like a scene out of the Walking Dead. Hopefully this information will be most useful for those who are thinking of taking their Code Club the next level by adding a few more activities.
A bit about computer networks
If you bring your own network, you are most likely reasonably good with configuring everything, so you can skip this section. However, if you’ve been using an existing network so far, it’s worth understanding network basics, so you can do some light troubleshooting and tell the IT guys when things are broken, or save your Code Club session by quickly fixing issues yourself. It’s generally useful to underestand how things work on the network so that you can easily connect new devices to the network (if this is allowed at your location). If you’re doing Code Club at a school, you probably will be allowed to connect other things.
This YouTube clip is one of the simpler explanations of computer networks. It should give you enough of an understanding to know what information you need to get from the IT guys in order to set up fun stuff on the network.
Connecting other operating systems to your Code Club network
Some of the places where a Code Club is run will usually have one predominant operating system on their computers. This is likely to be Windows, Mac OS X, and some might have Linux. However, it’s unlikely that there will be anywhere with all three operating systems. This means that one day, you may want to connect something to the network, that is out of the comfort zone of the IT guy at the school or library where your Code Club runs.
At some point, it really pays to find a time to attend the Code Club location outside club session time. You may only have to do this once, and this gives you a chance to tee up a time to talk to the IT guy about how their network works, or anything that needs to be added/changed on the main computers you use. If you have Raspberry Pis or something that runs on an operating system that is not used at that site, you may have a volunteer who can bridge that gap between yourself and the IT guys when it comes to anything non-standard to that environment.
Remember security and privacy
u
Preparing your robots
Connect to your robot’s IP address as the pi user, using ssh from the Terminal app on Mac OS X, or from Putty on Windows.
Uncomment the following (by removing the ‘#’) in the /boot/config.txt file.
Type sudo nano /boot/config.txt to edit that file.
hdmi_force_hotplug=1
Use nano to configure the required wireless connections in /etc/wpa_supplicant/wpa_supplicant.conf
o
if you label each connection using the id_str = “<name to identify location e.g. home>” then you can use those instead of wlan0 in the file /etc/network/interfaces
Here’s where I found the information.
However, if you have a portable network access point (AP), you’ll want your rpi to connect to that in preference to others e.g. if you are at the school and your portable wifi AP is on, you might want your robots to connect to your own portable wifi AP rather than the school wifi. In this case, you can set a priority for each network in /etc/networks/interfaces using a line like priority = 2 where the configuration with the highest priority will be connected to first.
Take your network with you for demos
There’s times when it really pays off to be able to demo things that have been created at Code Club. It really helps for parents, other teachers, and any other stakeholders to see value by giving a taster of what Code Club is about. This applies equally to other similar activities such as school maker groups.
Although we have regular visits from parents, kids, and teachers, sometimes you’ll be asked to present at a different location.
This means you either have to:
- depend on the wifi at the location, meaning you will need to bring or borryow screens for your Raspberry Pis or figure out which address they end up with, etc.
- bring your own wifi AP and have the IP addresses of your Raspberry Pi robots set up in advance, and working ‘out of the box’.
Obviously the latter method makes for less things that could go wrong, since the only thing you’re depending on is that there will be power. Even then, you can bring your own power packs.
There’s a few ways to set up your own network:
- use a wifi AP from your phone. This just means you have to make sure your phone stays near the robots during the demo. Usually, this means you’ll have 4G Internet as well, which is handy for Scratch and other online activities. Just make sure you have sufficient mobile data to cope with Internet activity for your demo.
- purchase or find an old wifi AP device that you can bring along. This can often be connected at the location, as long as you’ve asked for this provision beforehand. Otherwise, if you only need a local network and no Internet, you’re all good without plugging into another network.
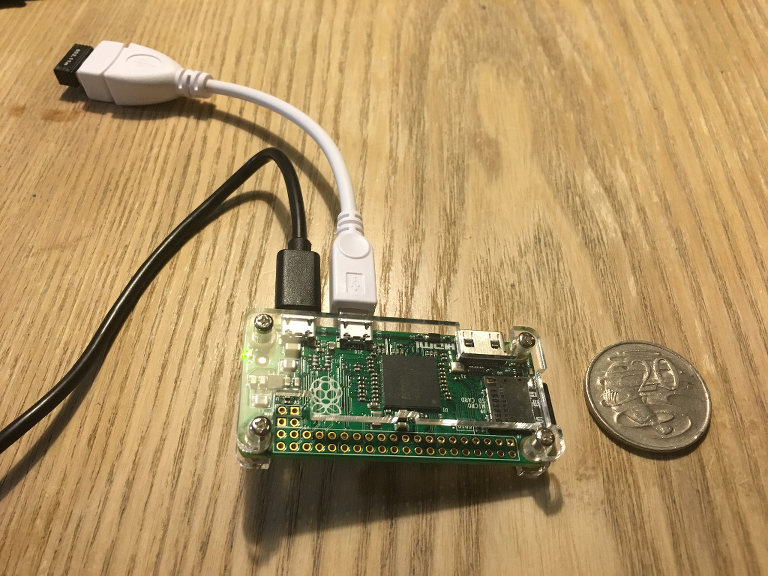
- create a makeshift wifi AP from a Raspberry Pi and wifi adapter. I did this recently using a Raspberry Pi Zero and an edumax wifi dongle. It worked really well and was quick to do. This requires the following software: dhcpd (a dhcp server to give out IP addresses, and can support static i.e. always set ones that you know) and hostapd. The last piece of software needs to be a version that supports your wifi dongle so you might just want to search around to go this route.
Here’s one I set up for a demo recently. It took about 20 minutes but I’ve done it before. If you’re tight on time, and aren’t all that technical, go for the other options. Just remember that if you’re doing robots without monitors (headless) then you want to be able to know what IP address they’ll be using. If you’re borrowing the location’s network, you may need to port scan. Again if this doesn’t make sense just ask someone more knowledgeable than you, like a technical volunteer.
Configure the Nano text editor on your Pi
If you’re connecting via the terminal (using ssh or putty on windows) then nano is probably the easiest to use if you’re new to Linux. You can set the configuration for the nano text editor.
The options I use are:
set mouse
set tabstospaces
Since set mouse will let you click on a line to go to it, and you can also hold down the alt key to drag-select some text with the mouse, then either right-click to select copy, or use the usual key combos e.g. command-c to copy and command-v to paste if connecting from Mac OS X, or control-c and control-v if connecting from Windows.
Using set multibuffer allows you to open up multiple files in nano at one timeYou can look up information like this on stackoverflow.com
Test everything beforehand
Although you may think everything is set up exactly as it should be, it’s important to test everything before doing things live. Since our Code Club is only one hour per week, if I mess up things, we have to wait another week until we can try again. This makes everyone sad and can give an inaccurate impression that the actual workshop itself is more difficult than it really is.
If you’re a teacher with limited technical skills, it works well if you can get a volunteer with those skills. When we first started, a previous student and I were the only ones to put up our hands to volunteer, but as things started to get rolling and peoples’ circumstances changed, we have started to gather more and more volunteers giving us a wider spread of skills.
It really helps to have a run sheet to follow with the robots. I found that if people ask questions that are in the run sheet, I’ll point them back to that. This helps them stay on the run sheet and reminds them to read more carefully. Once they get focussed, things will speed up and at the end you’ll be having to drag them away kicking and screaming, because they’re having so much fun ;).